Blog
Best DTF Cold Peel Instructions You’ll Ever Need
If you’re using DTF transfers with a cold peel finish, having the right DTF cold peel instructions is necessary. This is because cold peel DTF transfers require a bit more attention at the peeling stage to get a flawless look as well as long-lasting result.
In this blog, CustomAny will explain what cold peel means and walk you through simple, clear steps of using them. Then, you will be equipped with the knowledge of common mistakes and tips to avoid them. So, let’s dive in!
What Is Cold Peel DTF Transfer?
Along with hot peel, cold peel DTF transfer is a type of iron-on DTF transfers (also called heat press transfers).
For cold peel DTF transfers, after heat pressing your DTF transfer, you’ll need to wait for it to cool down to remove the film. This allows the ink used in cold peel DTF transfers settle firmly into the material, ensuring your design is transferred wholly onto fabric.
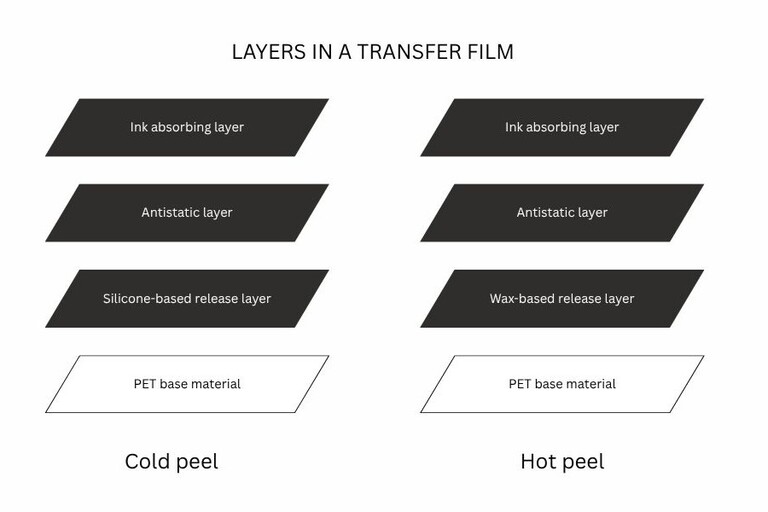
How does cold peel differ from a hot peel? The key difference is in when you peel the film:
- Cold Peel: The film needs to cool down completely before you can peel it off. Offers clean edges and strong adhesion.
- Hot Peel: You need to peel the hot film off right after heat pressing. Faster but needs more care to avoid lifting parts of the print.
For a detailed comparison, you may want to read our related blog: “Cold Peel vs Hot Peel for DTF Transfers”.
Why Some DTF Transfers Require Cold Peel
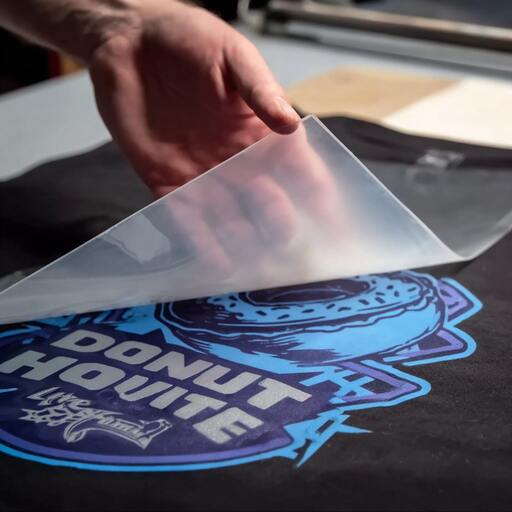
Certain DTF transfers need to be peeled cold because of the type of release layer used in the transfer film. Specifically, cold peel transfers have a silicone-based release layer. This layer requires you to let the film cool down completely before peeling it from the garment. If you peel off cold peel transfer film too soon, you can make the design lift, stretch, or lose its sharpness.
Besides, this type of DTF transfer is commonly used since it ensures to protect delicate prints by allowing the ink to set properly. This leads to cleaner, sharper edges and a more professional finish.
Thus, cold peel is especially useful for transfers on sensitive fabrics or with specific ink types that react poorly to immediate peeling.
For detailed explanation, you may want to read the blog “Cold peel vs hot peel DTF transfers”.
The Right Time to Cold Peel
Following proper DTF cold peel instructions means that you give enough cooling time and peel at the right moment. Knowing when to peel your DTF transfer is key to avoiding common mistakes and improving the overall look of your finished product.
So, here’s how to tell the right moment:
- Wait time: Usually, you should wait about 30 to 60 seconds after heat pressing before peeling off the film layer. However, exact time can vary depending on the temperature used, the transfer quality and the fabric type.
- Temperature cues: You should let the film cool down to room temperature or at least until it’s no longer hot to the touch.
- Testing readiness: Check by gently lifting a small corner of the film first. If it peels easily without pulling the design or leaving residue, it’s ready. If it resists, you wait a bit more and try again.
These are the first of DTF cold peel instructions to help you achieve clean, sharp results.
DTF Cold Peel Instructions: Step-by-step
After heat pressing your DTF transfer, we recommend following the right DTF cold peel instructions as follow:
Step 1: Let the transfer cool completely
This is the most important step. You need to wait for the DTF transfer to cool down as the recommendations we’ve talked about in the section above.
Waiting ensures the adhesive bonds properly with the fabric. On the other hand, skipping this waiting step will cause your DTF transfers to distort or lift with the film layer when you peel it off.
Step 2: Gently lift one corner
When it cools down, you need to lift the film layer, starting from a small corner and in a careful way.
This step helps you check if the transfer is ready without damaging the whole design. If the corner doesn’t peel off easily, give it more time to cool.
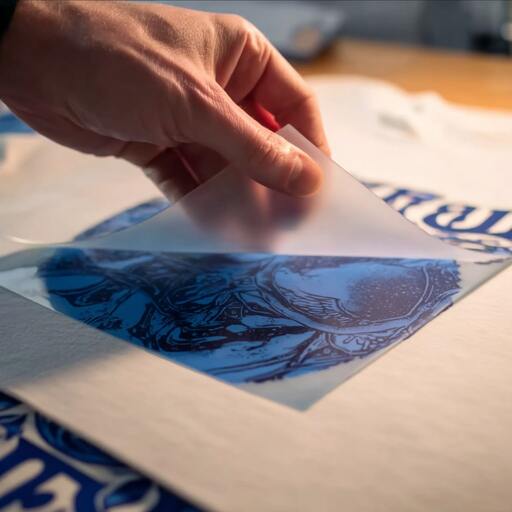
Step 3: Peel slowly at a consistent angle
When the film layer is ready, peel it off slowly, keeping a steady angle (around 45 degrees). Moving too fast or at different angles can cause the transfer to tear or lift unevenly.
Step 4: Stop if resistance or lifting occurs
Rushing in this peeling process always leads to ruins in your transfer. So:
- If you feel strong resistance when peeling the film, you need to pause and wait a bit longer.
- If you see the design starting to lift from the fabric, stop immediately and heat press your DTF transfers for about 10-25 seconds more, then start the peeling process over again.
Following the last step in our DTF cold peel instructions, you’ll achieve clean, crisp results when applying your DTF transfers.
Common Cold Peel Mistakes
When working with DTF transfers, there are some common mistakes that people may make.
- Not enough cooling, peeling too early: This mistake happens if you peel the film when there is not enough cooling off time. It is when the ink hasn’t fully bonded with the fabric, and this can lead to ruining the sharpness of your design, incomplete transfer result. So, always wait until the film is cool as in our DTF cold peel instructions.
- Peeling too fast: Rushing the peel can cause the design to crack or stretch unevenly. Peeling slowly and steadily at a consistent angle as in our guide will give the best results and prevent damage.
Sticking to clear DTF cold peel instructions will help you avoid these mistakes and produce professional-looking transfers every time.
Pro Tips for a Clean, Smooth Peel
To get the best results following your DTF cold peel instructions, here are some helpful tips:
- Use a cool, flat surface: Placing your heat-pressed item on a smooth, cool table or countertop speeds up cooling and helps avoid wrinkles or warping.
- Lightly press down on edges before peeling: Use your fingers to gently press down on the edges of the film to make the printed design adhere better and prevent curling or lifting during peeling.
By following these DTF cold peel instructions carefully, you can achieve smooth, professional-looking transfers that last longer and look great.
Last words
With our comprehensive DTF cold peel instructions, you now have known all the tips and tricks for a proper peeling process. By removing the film at the right moment and avoiding common mistakes, you will achieve clean, sharp transfers with ease.
If you’re looking for quality transfers, you can order custom DTF transfers, which are ready-to-use cold peel ones from our website here.


