Blog
How to apply Transfer Stickers Properly – With Zero Mistake or Damage
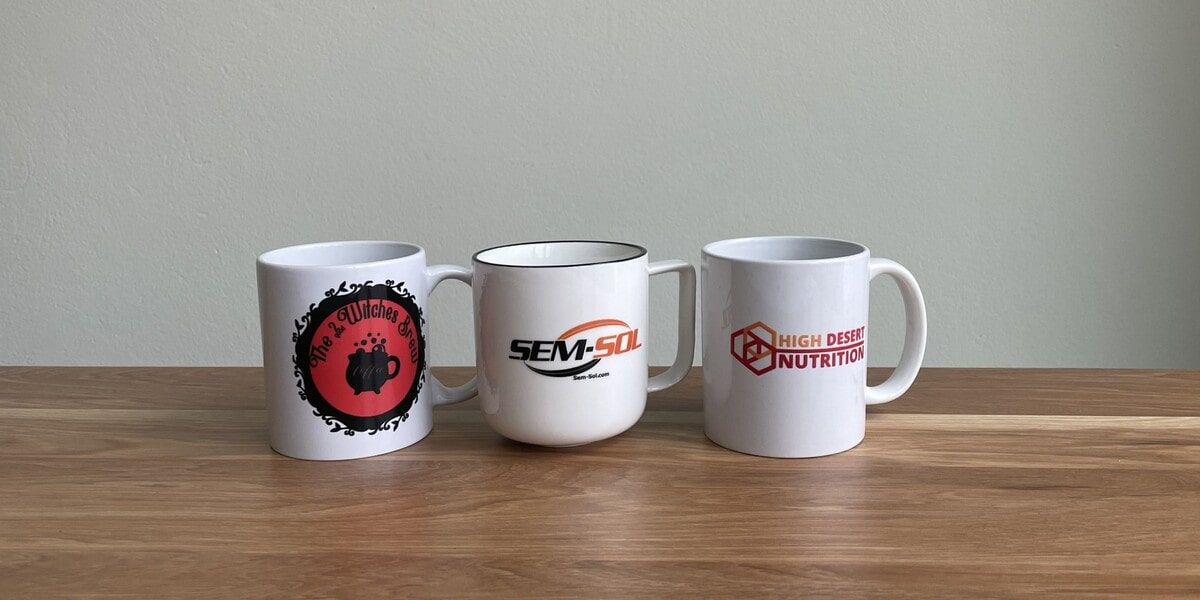
Transfer stickers with a professional raised surface are a fantastic choice to personalize your belongings or promote your brand. When done correctly, it holds the power to transform surfaces into eye-catching masterpieces with cut-to-the-shape and clear-background design. Its details, even if they are separate, appear in the correct position as originally intended.
However, what can happen if you do it the wrong way? The stickers may be torn, or peeled off from the surface, etc. To help you with this, in this guide, CustomAny will equip you with the knowledge and insights necessary to master the art of how to apply transfer stickers flawlessly.
Let’s dive in and discover how to transfer vinyl stickers onto surfaces.
Understanding Transfer Stickers
Having a thorough understanding of transfer stickers, including their structure, application surfaces, and mistakes in application, is the key step when beginners start to learn how to use transfer stickers, or how to apply transfer stickers.
How transfer stickers are made
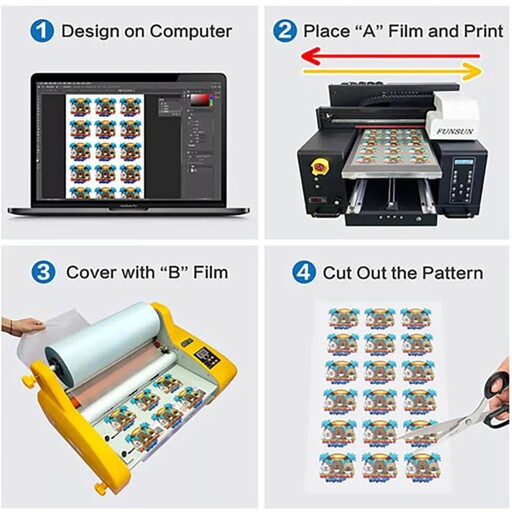
Transfer stickers are an adhesive decal without a background and making transfer stickers involves multiple layers.
At the bottom, there is the backing layer, which protects the adhesive. On top of the backing layer is the sticker layer carrying the design or message. Lastly, there is the transfer tape layer, which holds the sticker design in place and allows for precise application.
Suitable surfaces for applying transfer stickers
Transfer stickers adhere best to smooth and non-porous surfaces such as glass, metal, plastic, and even painted surfaces.
To achieve the best result when applying a transfer sticker to a surface, it is crucial to ensure that the surface is clean and free from any dust, grease, or debris. So, before applying the sticker, thoroughly clean the surface and let it dry completely.
Mistakes that may happen when applying transfer stickers
As mentioned above, since the transfer sticker has a 3-layer structure with strong adhesive and often has a design with many separate details, when applying them, you may face some issues:
- Designs on stickers coming off with other layers: If the transfer sticker is not properly rubbed or adhered to the transfer tape, the design may come off and be removed with the other layers (the backing or the transfer tape) when you remove these layers. This can result in a partial or incomplete design on the surface, which is not desirable.
- Rushing the removal of the transfer tape layer: When removing the transfer tape layer, it’s important to proceed with caution and avoid rushing the process. Pulling the tape too quickly or at the wrong angle can cause the sticker to lift or tear, ruining the design.
Moreover, when exploring how to transfer stickers onto places, you will find that unsuitable (rugged, curved,…) or not clean surfaces may lead to another issue:
- Bubbles or wrinkling: Sticker is not properly smoothed onto the surface because it’s not clean enough, or there is trapped air during the application process. Bubbles and wrinkles can compromise the overall appearance of the design.
How to apply Transfer Stickers Properly
When any of the aforementioned problems arise, it’s troublesome. The damaged sticker can’t be utilized, improper application might harm the surface, and this also waste your time and money. So, to ensure a mistake-free and damage-free application, here are the steps on how to apply transfer stickers properly.
Step 1: Prepare the surface
Before applying transfer stickers, it is crucial to prepare the surface properly. Start by ensuring that the surface is clean and dust-free. Use a mild detergent or soap and water to clean the surface, then dry it thoroughly. This will ensure better adhesion and longevity of the transfer sticker.
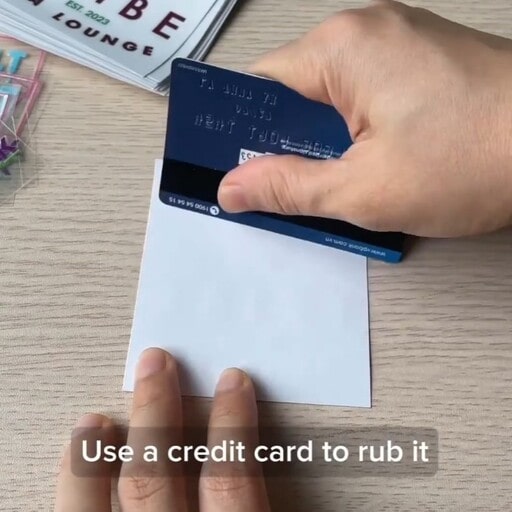
Step 2: Rub on transfer stickers
Once the surface is clean and dry, take the transfer sticker and gently rub it with your fingers or a credit card. This step is crucial to eliminate any air bubbles that may have formed, allowing for an easier bubble-free application.
Additionally, rubbing the transfer sticker helps to firmly bond the sticker layer to the transfer tape, preventing it from coming off with the backing layer when this layer is removed. However, it is important to be cautious not to rub too forcefully, as it may tear the film. Instead, handle the rubbing process with gentleness and patience to achieve the desired outcome.
Step 3: Remove the backing layer
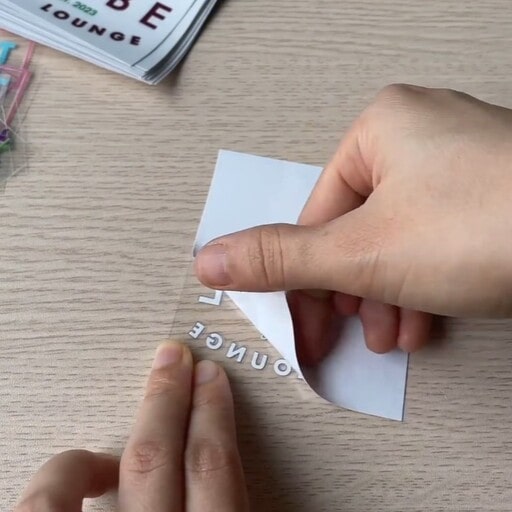
Carefully remove the backing layer of the transfer sticker, revealing the adhesive side. Start by lifting one corner of the sticker and slowly peel it away from the backing, working your way across. Take your time to avoid tearing the sticker or causing any damage.
If any part of the sticker starts to lift with the tape, press it down firmly and continue peeling.
Step 4: Apply stickers onto the surface
Once you have removed the backing layer, align the design or message of the transfer sticker with the desired position on the surface. Place the sticker on the surface and gently press it down.
Step 5: Rub on the transfer stickers, again
After applying the transfer sticker onto the surface, rub it again. This step ensures that the adhesive properly adheres to the surface, increasing its durability and preventing any peeling or lifting when removing transfer tape.
Step 6: Remove transfer tape layer
The last step to applying transfer stickers is to carefully remove the transfer tape layer. Slowly peel it away from the surface, working at a low angle. Be patient and make sure not to pull too quickly as it may cause the vinyl sticker to lift or tear.
When searching for how to transfer stickers from one surface to another, we discover that transfer stickers can be moved to a different surface.
However, it’s important to note that repeated transfers may decrease the adhesive strength and overall lifespan of the sticker. So, it’s always a good idea to plan your application carefully before applying the sticker completely to ensure there’s any reapplication.
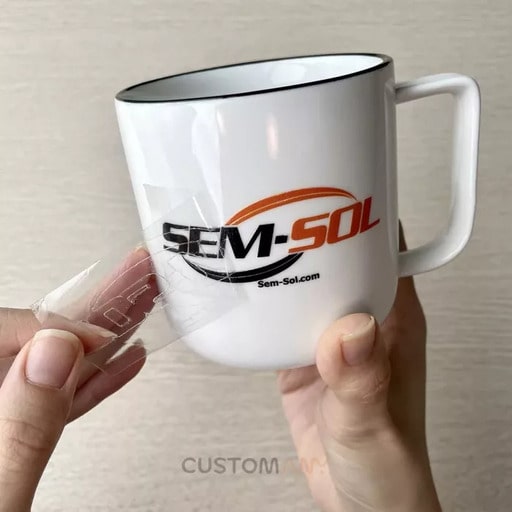
Tips for applying transfer stickers without Mistake or Damage
Apart from these above steps on how to apply transfer stickers, here are tips to ensure a successful and damage-free application:
- When placing the transfer sticker onto the desired surface, make sure to apply even pressure. This will ensure that the sticker adheres uniformly and minimizes the risk of wrinkling.
- Before peeling off the backing layer or the transfer tape, gently rub the transfer sticker with your fingers or a credit card. This step helps to secure the sticker to the transfer tape and prevents it from coming off and being removed with the backing layers.
- When it’s finally time to remove the transfer tape layer, take your time and proceed with caution. Slowly peel the tape back at a low angle, ensuring that the sticker remains adhered to the surface.
- If, at any point, the transfer sticker starts to come up with the backing layer or the transfer tape, don’t panic. Simply go back and rub on the sticker again. This will help re-adhere the sticker to the transfer tape, allowing you to remove the layers without any issues.
Conclusion
In conclusion, the proper application of transfer stickers is a skill that allows you to elevate your designs with precision and creativity. By following the tips and techniques outlined in this guide, you can achieve a perfect process on how to apply transfer stickers, avoiding any mistakes or damage.
After learning how to apply transfer stickers, it’s time for you to take your sticker game to the next level. Visit our website today for endless possibilities for personalization and branding with high-quality custom transfer stickers!


