How to create outline in illustrator for your stickers: The comprehensive guide
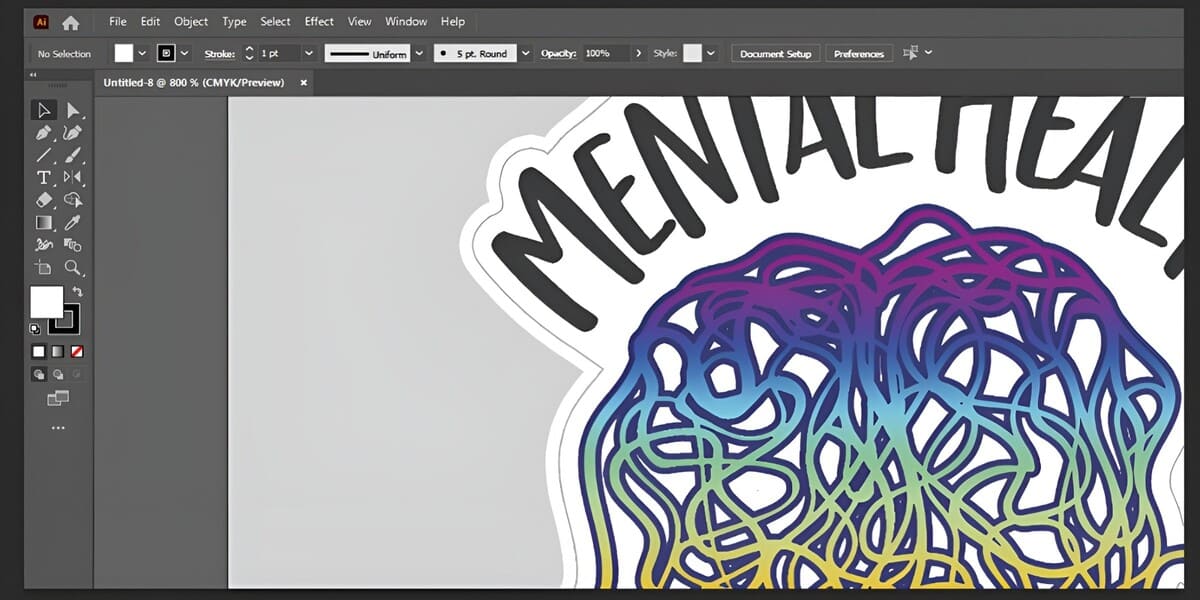
Understanding the importance of a well-defined sticker outline is crucial for anyone who wants to make custom stickers. The sticker outline serves as a guide for the cutting process. It also enhances the design outcome of your stickers.
In this guide, we at CustomAny will explore why a sticker outline is necessary. In addition, we will show you the step-by-step process on how to create outline in illustrator. Let’s find out!
Understanding Sticker Outlines
What is a Sticker Outline?
The sticker outline is a vector path that borders your artwork. It indicates the precise location and position of the sticker’s cutting.
With the sticker outline, we can precisely cut your designs. You can see a white border around most stickers, and it’s the cut line.
Why Use Sticker Outlines?
A cut line creates the characteristic white border on sticker designs. It also functions as a cutting guide.
In addition to enhancing the design’s visual attractiveness, this border is functional. It protects the design and makes it stand out from the backdrop.
When to Use Sticker Outlines
You can use sticker outlines with a variety of stickers, including:
- Die cut stickers
- Kiss cut stickers
- Uniform-shaped custom stickers like rectangles or squares.
The sticker outline is useful when applying the sticker to a surface with multiple patterns or designs. It helps define the shape of the sticker and prevents the sticker from blending into the background.
In addition, sticker outlines are useful when you want to emphasize the shape of the design. This is particularly recommended for die-cut stickers, where the outline can accentuate the intricate cutout details and make the design more visually appealing.
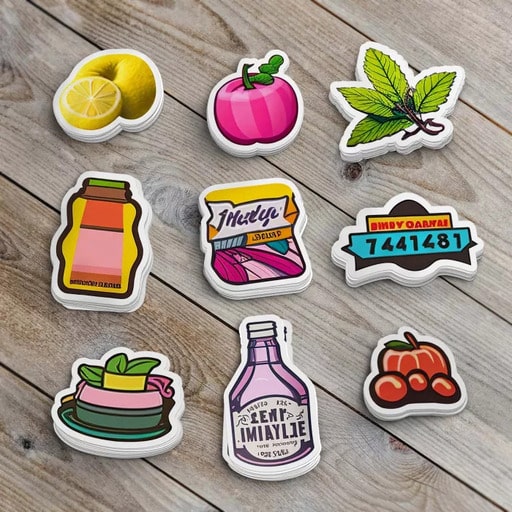
How to create outline in Illustrator for your stickers
There are several steps to making easy outlines, and they are a little different based on whether the art is in vector or raster format. So, CustomAny has included detailed instructions for each format as below:
For vector artwork: how to cut a line in illustrator
Step 1: Starting the process
- Launch Adobe Illustrator and import your design.
- Find the strokes in your design.
- You may locate them with the aid of the Outline view (Press ⌘ + Y on a Mac or CTRL + Y on a PC)
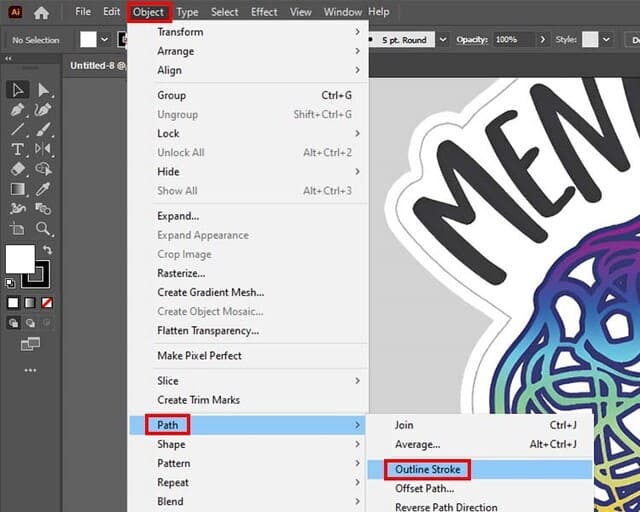
- Choose the strokes you want to outline and then go to Object > Path > Outline stroke.
Step 2: Create outlines illustrator
Select all of the text that is included inside your design.
Then, choose Create Outlines from the context menu (right-click). Press Shift + ⌘ + O on a Mac, or Shift + CTRL + O on a PC. Go to Type > Create Outlines if you want to use the menu system.
Step 3: Creating the cut path
- Select the Layers window while holding down the Option (Mac) or Alt (PC) key.
- After that, duplicate the layer containing your artwork. You may make the cut line on the newly created duplicate layer.
- Make use of the pathfinder tool’s “unite” feature on the duplicate layer to combine all of the vector objects into one.
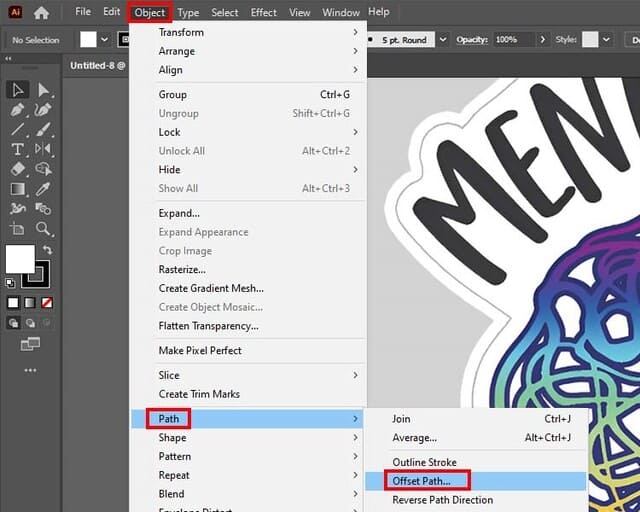
- Select Object > Path > Offset Path to make the cutline on the copied layer.
- In this step, you’re able to choose the width of the border. We advise using a minimum of 0.07 inch.
- Reuse the pathfinder method to unite the vectors. Following that, turn the filled object into an illustrator outline stroke. Using the little arrows located above the fill/stroke color panel is the simplest method for this.
- Our wording and design are now separated, and the cut line appears to isolate each one.
Step 4: Cutting Line Cleanup
- Use the pen tool to fill in the spaces between the cut lines. You can add an extra border by picking the tool and creating a new shape at the desired location.
- Then, click the “unite” option again.
- You can also simplify the cut line and slightly round the corners. Pick the cut path, and use the menu to go to Object > Path > Simplify. A slider will appear so you can choose how much to simplify.
- Also, you may change the corners by clicking the direct selection tool, which will bring up the choice on the top bar. The recommended range for corner radiuses is between 0.025 and 0.03 inches.
- After you’ve made the cut line, you may lock the layer.
For raster artwork: how to make a sticker outline in illustrator
Step 1
- Launch Adobe Illustrator and open your design.
- To add more layers, hold down Option (on a Mac) or Alt (on a PC) and drag the layer containing your artwork onto another layer.
- A new layer will be created by doing this. Here, you may make the cut line.
Step 2
- To transform a picture into a vector format, pick it and then open the Image trace window.
- While performing this stage, don’t worry about colors or precise details. Accurately matching the shape’s perimeter to your initial design is the only thing you should care about.
- Click on Expand when everything is in order. A vector shape will be generated.
Step 3
- Illustrator will commonly generate a white border around your design; you must eliminate this.
- Just right-click on your design and choose “Ungroup” to remove it. Then, choose the boundary and click Delete.
Step 4
From this step, you can follow step 3 and 4 as for vector artwork to complete your sticker outlines design (from the use of the “unite” feature to the end).
Design Principles for Sticker Outlines
When designing sticker outlines, two important design principles to consider are the width and color of the outlines.
Width
The sticker’s final outcome depends heavily on the width of the outline. You may make the pattern stand out more with a broader outline or make it seem more delicate and understated with a narrower one.
For example, at CustomAny, we usually use 0.085-inch borders on 3-inch stickers. This ratio is enough to make our stickers noticeable with their design.

Color
Usually, people will use white sticker outlines. Because white can be easily paired with various background colors and designs. It provides a clean and crisp look, making the stickers stand out effectively.
However, there are cases where using another color will give a better effect. You can choose contrasting color pairs. For example, if the sticker has a dark background, using a light-colored outline, such as yellow or light blue, can create a strong contrast and draw attention to the sticker.
Last Words
In conclusion, to design high-quality stickers, it is essential to create a precise outline.
Hopefully, following the steps outlined in this article, you will have no trouble making stickers that are both well-cut and aesthetically pleasing. Besides, CustomAny team hope you can learn how to create outline in illustrator to bring out the best sticker designs.
Now, it’s time to be confident in your ability and apply what you have learned to begin making beautiful sticker designs. Once you have done designing your stickers, go to our website to turn these ideas into real ones. CustomAny will provide you with the best printing service.


