7 terrible mistakes when getting your sticker file ready for printing
In this digital age, printing a sticker is now an easy task that can be done with the help of a few tools, techniques and machines. With that in mind, the quality and time of printing a sticker now mainly depends on the quality of the print file. You have to get everything right and ready before printing out your sticker design or sending it to a commercial printer.
However, what is a sticker file that is ready for printing? Not everyone knows how to adjust all specifications of the sticker file to produce a high-quality print product, without additional intervention. That’s why in this article, we will lead you through 7 terrible mistakes and suggest the right way to get your sticker file ready for print.
1. Don’t check for spelling and grammar errors
Whether you need to print a lettering sticker that is full of text or just an ordinary image with a short quote, you’ll never want even a silly misspelling, cause you’ll print stickers in bulk. Unless it’s an intentional ‘mistake’ to highlight your design, double-check the content on your sticker before sending it for printing to avoid unnecessary spelling and grammar mistakes. Usually, text on a sticker will not be too long or too complicated, so you can check it manually. In case you have a lot of stickers with different texts, copy and paste them into Microsoft Word or other softwares to check if there’s any error.

2. Low resolution (dpi < 300)
Resolution is the indicator that shows how many pixels or dots are there in one inch of your file. It is usually identified by dpi (stands for ‘dots per inch’) or ppi (stands for ‘pixels per inch’); but sometimes by the width and height of your sticker image. The resolution of your file is the key to your sticker sharpness, especially in case your stickers are images. On your sticker file, the higher the density of dots per inch, the higher the quality of your print product. If you don’t want your sticker a blurry, indistinct print, keep your file resolution at least 300 dpi.
Plus, don’t ever mistake size and resolution of your print-ready sticker file. A large size does not determine the sharpness of the print. For example, a file in 1500 x 1500 px which has resolution is 72 dpi turns out much grainier than a file in 720 x 720 px but has the resolution of 300 dpi. As a result, take into account both your sticker file resolution and size to get the best print.
3. RGB instead of CMYK
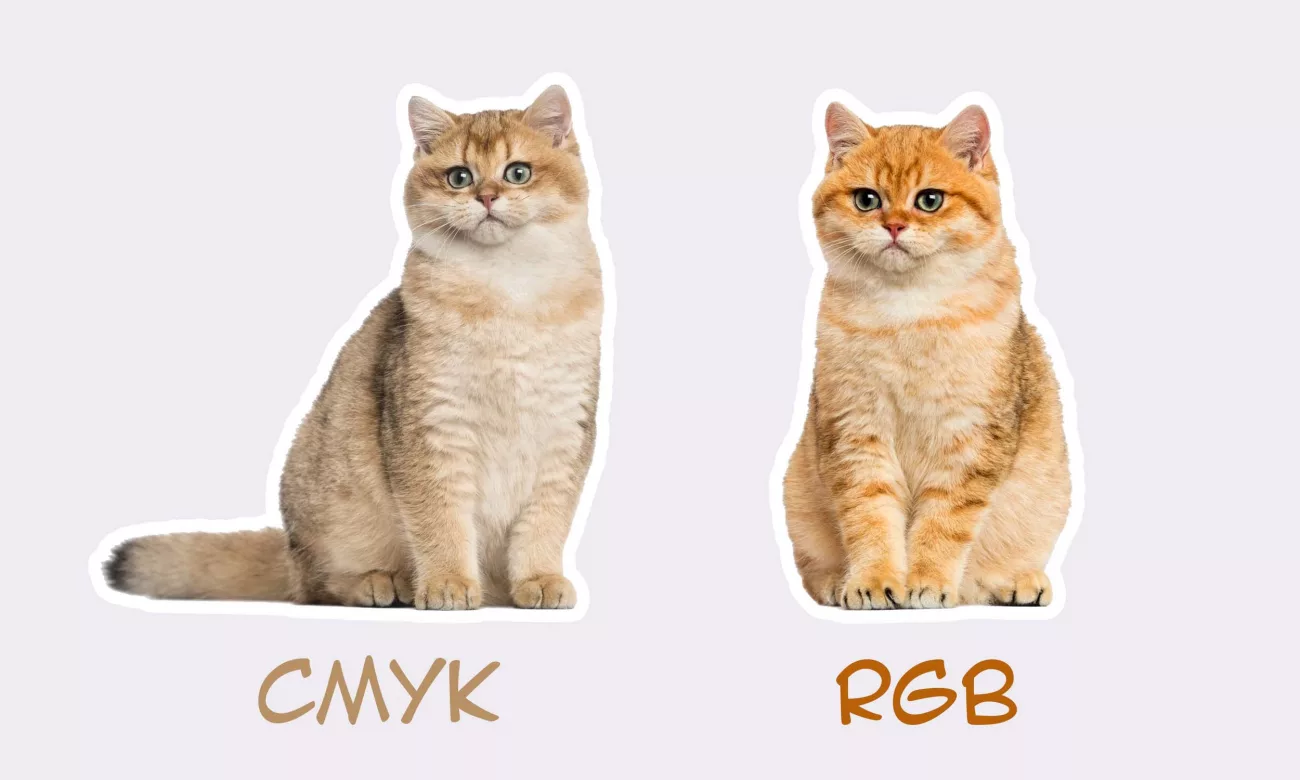
RGB and CMYK are two different color modes and each has a different intended use. RGB, stands for Red, Green and Blue, is a color mode used for screen display. Meanwhile, CMYK, stands for Cyan, Magenta, Yellow, and Key (also called Black), is the color mode used for ink printing.
You can completely print a sticker with the print file set to RGB color mode. However, there will be some differences in the final print hues due to 2 main reasons. Firstly, even though your sticker file is set to RGB, not every screen displays color the same. Secondly, the color mode of most industrial printers is set to CMYK. These factors result in the most difference in colors displayed on your screen and on the printer’s screen, and also the colors on the final print and the design.
To get your desired color perfect printing, set any design to the CMYK color mode before printing. If you are not sure how to change RGB to CMYK on the design program you are using, read the detailed instructions in our other blog here.
4. Raster instead of vector
Raster images represent figures by rectangular dots or a grid of pixels while vectors represent images with lines stored in a format that combines geometric formulas. In a word, when zooming in on a raster image, the pixel dots will become larger, more noticeable and blurred, while the vector image allows your sticker ready image to be sharp and clear at any chosen size.
Rasterizing your file for printing sometimes results in blurry and unclear prints, especially when you print them in large size. Vectors are recommended for designing a print-ready sticker file. Use Adobe InDesign and Adobe Illustrator for editing these vector files to be sure with your prints quality.
5. Inefficient or no bleeds
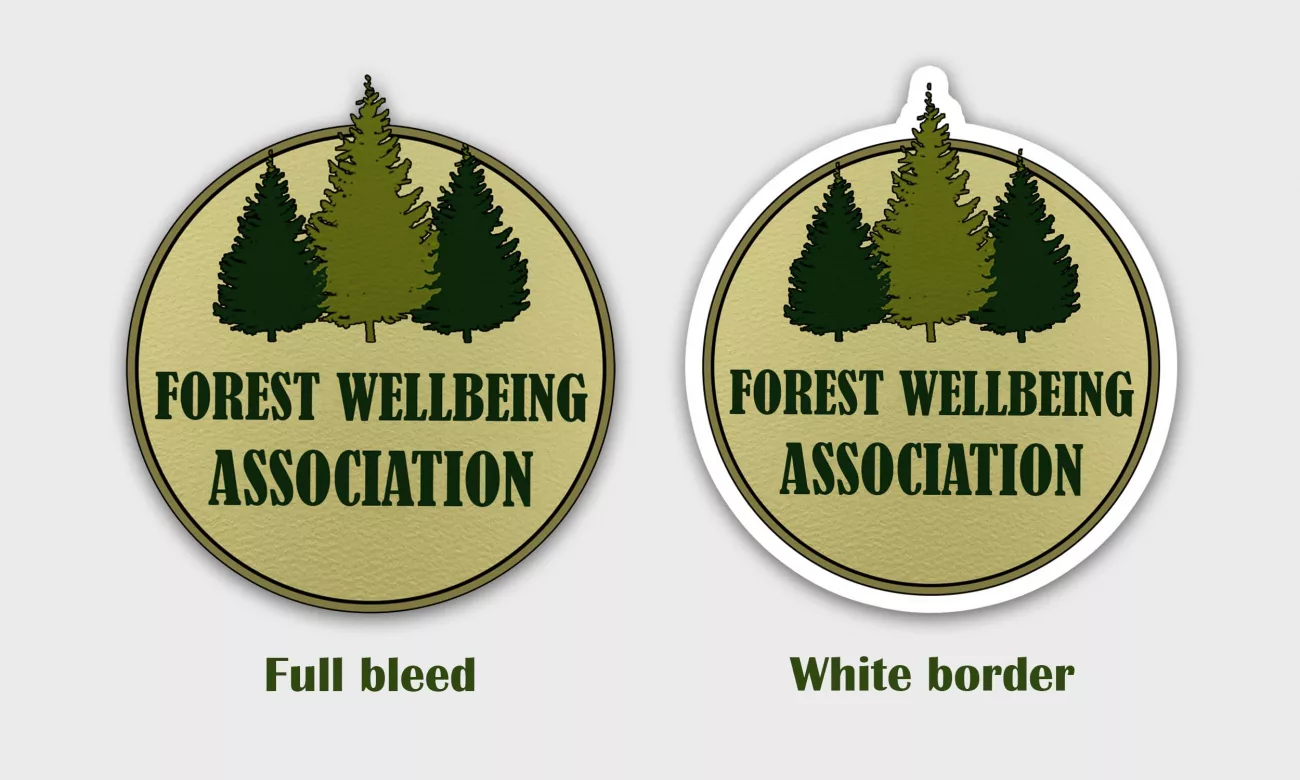
Bleed is an important part of a sticker design which ensures your whole design goes to the edge of the border line. After your sticker is printed, this extended portion will be trimmed off along with the guide of crop or by the printer’s marks. The bleed of the file that is ready for printing prevents any excess whitestrip around and creates a professional look for your stickers. The ideal width range that makes a good bleed is from 1.25 to 3mm, depending on the size of your sticker.
6. Wrong format
Setting your sticker file to the right format is an important step to get it ready for printing. At CustomAny, all popular print file formats, including JPG, JPEG, PNG, TIFF, EPS, Illustrator, Publisher,… are accepted. However, for a fast and straightforward printing process, as well as for no additional action that need to be taken, we recommend sending your sticker file in Illustrator to make your file ready for printing.
7. No proof before printing
A proof-of-print is a template that provides the closest look of your sticker’s actual shapes and colors before it’s professionally printed. As the screen display does not always show the full story about your final prints, you need a proof if you want to be confident about what you’ll receive. No proof before printing stickers in bulk will cost you a treasure if the final stickers are not as you expected.
Request for a proof from your commercial printer also is a way of making sure that your sticker file is ready for printing. You can choose between a soft proof which is an electronic file or a hard proof being sent to hand. Testing your artwork file with the proof is the last essential step for the overall success of your sticker printing project.
In short, 7 mistakes that we’ve rounded up are the most common mistakes when any one gets a sticker file ready for printing. Each of them can result in low quality or defective print products, thus causing a waste of time and money for your sticker printing. We hope that the suggestions above are a good guideline and checklist for you to create and adjust your design into a print ready file. If you still have questions about sticker printing, don’t hesitate to contact us. We are honored to be your supporter in any printing project.

